How to Use Fisheye Lens Efficiently or What Should You Know About Fisheye Lens
1. What is The Fish-eye lens?
 A fish-eye
lens is a super wide-angle lens produces strong visual barrel distortion in order to create a wide panoramic image.
The name "Fisheye" was introduced in 1906 by Robert W. Wood. It imagine how a fish would see the objects from beneath the water.
First use of such lens was for meteorology, since allows the whole sky-sphere observation.
It is still using for scientific researches, where panoramic pictures with ~180° are needed.
To achieve super wide-angle field-of-view fish-eye lens usually has short focal length. For examples, typical focal lengths of fisheye lenses for Full Frame sensors (24mm x 36mm) are ~8 mm for "circular" images, and ~16 mm for "diagonal" images.
The angle of view of a fisheye lens is usually between 100° to 180°.
Now fish-eye lenses are quite popular for consumer usage as well. It is mostly using for landscapes photography, architecture and funny portraiture.
2. Fish-eye lens types
The fish-eye lenses generally can be divided by two groups: Circular Fish-eye and Diagonal Fish eye.
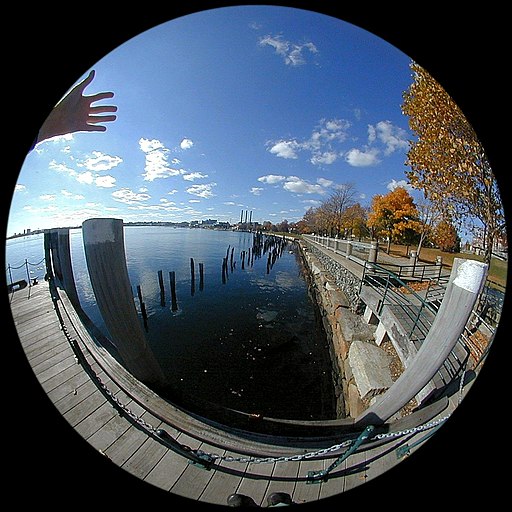
Circular Fish-eye is a lens which produces whole circular image on the sensor and covers only part of the picture frame. It produces ~180° field-of-view for every direction. (The picture taken from Wikipedia)
Diagonal Fish eye is a lens which covers whole picture frame. It produces ~ 180° of Diagonal field-of-view, ~147° of horizontal field-of-view and ~ 94° of the vertical field-of-view.

Please remember: The name (Circular Fish-eye or Diagonal Fish eye) divides by groups based on how image circle covers the sensor. That means it depends on the diameter of the image circle produced by lens (based on format design: Full frame, Four Third, ASP-C etc...) and on which format is exactly using for specific lens mount.

For example: (See picture at the right) the lens with 8mm focal length is designed as Circular Fish-eye for Full frame sensor, means the image circle will be WITHIN 24mm x 36mm (black) area.
Same 8mm focal length lens can be used at Four Third system (17.3mm x 13mm red), were become Diagonal Fish eye.
At this moment many variants of Fish-eye lenses exist in the market (designed for Full Frame with usage at APS-C, designed for APS-C with usage at Four Thirds etc..).
As a result, any classification may not be strict. For example: Samyang 8mm f3.5 is designed as diagonal fish-eye (diagonal field-of-view 180°) for APS-C sensor. Same lens with Four Third bayonet will provide Diagonal field-of-view~165°-167° only. Be aware…
3. General observations of Fish-eye lenses:

You have to know several things about fish-eye image:
a. There are two middle strait lines: horizontal (blue) and vertical (green) which have ZERO distortion.
b. There is central area of the frame (blue), where the distortion is MINIMAL.
c. Four corner areas (yellow) have STRONG visible distortion.
Focus is very easy task for Fish-eye lens. The depth-of-the-field is very wide, so most of the combinations under good light conditions will give you possibility to shoot at hyperfocal distance. For out-door photography you may stop aperture down for about f5.6-f8.0. Align the focus on the nearest / chosen object, for landscapes – almost to infinity. Due to hyperfocal effect everything will be in-focus.
Based on these observations we will try to establish the rules of lens usage.
4. Landscape picture tips.
a. Stick the horizon to the middle line with zero distortion. It will look like panoramic picture:

b. For better visualization during post processing you may easily crop the image (above or below the middle line) to achieve the golden section:

c. Remember to control straight lines at the corners (yellow areas) – it may look somehow funny, but may be weird:

5. Architecture and street picture tips.
a. Keep major strait lines (basement, facade, roads, roofs, columns) in align with the middle (Horizontal or Vertical) line:

b. Use Symmetrical elements at the picture to balance distortion:

6. Close up / Funny portraiture tips.
Take pictures of big objects from the very short distance, but the majority of the frame should be covered by main object. It is better to place this object to the middle of frame, where distortion is less visible:

7. Sky pictures tips.
a. Since the lens was developed for sky-sphere photography, it is good to show only sky (no horizon) at picture. The lens should be pointed to the zenith:

b. When the horizon is not aligned with middle line or not pointed to the zenith you have to have main object at the sky (Aurora, Lightning, Clouds, Plane etc...) which should be spectacular!

And the last: check whether your legs or fingers can be seen within the frame. If yes – remove it. Have a fun!
All pictures were taken with:
Samyang 7.5 mm f/ 3.5 UMC Fish-eye MFT
Just some more interesting pictures:

 Natali Stangrit's color palette
